
Make this simple DIY No Sew Tutu in about an hour…the perfect last minute Halloween costume accessory! I was able to pick up all of the supplies for this DIY No Sew Tutu Tutorial at Walmart for less than $5…much cheaper than what you would pay for a tutu at the store!

DIY No Sew Tutu Tutorial
A Fun & Inexpensive Halloween Costume
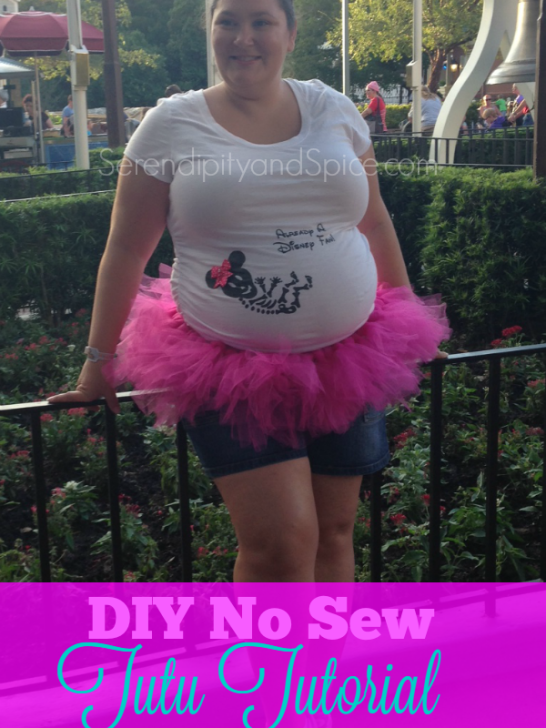
So last week we went to Mickey’s Not So Scary Halloween Party and this pregnant mama needed a simple costume that would be comfortable and affordable! I had already come up with the concept of my Already a Disney Fan Pregnancy shirt but I felt like it was missing a little something….you know, that little extra magical touch that makes an ordinary shirt into an AWESOME costume. Well, let me say, once I added this little tutu to my costume I got a TON of complements from other people walking around Disney World!
Those of you that follow me on Instagram probably recognize this as the tutu I made in the car on the ride from Charlotte, NC to Orlando, FL. Yep, this tutu is so simple that you can make it while riding in the car! Anyway, I decided my outfit needed a tutu at the last minute so on one of our stops I made Hubs’ go to Walmart so I could pick up a few items.
This project actually became a no sew tutu tutorial on accident because I forgot to buy the needle and thread while we were at the store- Hubs’ refused to make another Walmart stop and I refused to pay $6 for a simple sewing kit at the gas station that I knew I could buy at elsewhere for $2! But, it actually worked out better being a no sew tutu project I think!
Okay, so, I did this in the car in just a little over an hour….so if I can do this in the car while riding you can totally do this while hanging out in front of the tv!
DIY No Sew Tutu Tutorial
What you need:
3 Spools of Tulle (found at Walmart craft department for $1 each)
Elastic banding (measure your waist…that’s how much you need)
Scissors
I started off by cutting the tulle into 8″ pieces. Now, this is not something that you have to measure perfectly…some of the whimsy comes from the different length tulle pieces! I just decided how much I wanted the tulle to stand out and started cutting. I would cut about 20 pieces that were basically the same length (that’s why I like using these spools instead of larger bolts of tulle…it makes the cutting MUCH easier). The most efficient way to make this no sew tutu is to cut an entire spool of tulle before you start knotting it to the elastic banding.
For this project I just used left over elastic banding from another project but I think it was just basic 3/4″ elastic banding that I found in Walmart for like $1. I just measured it around my waist and cut the length I needed. Then I just tied the ends together in a double knot…this is actually better than sewing because now it’s adjustable…I’m a SUPER crafty genius! 😉
Next I just took 2-3 pieces of tulle at a time, folded them in half, and made a slip knot over the elastic banding. Now your banding will try to fold into the tulle but just give it a little tug and keep going….you’ll be able to tug and get it all looking great at the end….so don’t worry if your tutu looks like a big heaping mess of tulle half way through. 🙂 Make sure that you do your slip knots all in the same direction so that you have a uniform look to your waistband.
Repeat with each spool of tulle until your elastic band is full and pretty! 🙂 Now, depending on the size of tutu you are making will make a difference in how many spools of tulle you will need. The length of your tutu will also make a difference. These are the measurements that I used for an adult pregnant woman who wears a size 14-16. Obviously if you’re making this tutu for a toddler then you may only need 1 or 2 spools of tulle.
What are you going to be this Halloween? Share in the comments below!